You’ve got scratches on your engineered floor, the finish looks tired, and you’re wondering whether sanding is even an option. It’s a common question—and the answer can save you thousands of dollars or cost you your entire floor if you get it wrong.
This guide breaks down everything you need to know about sanding engineered wood flooring, from understanding your wear layer to choosing the right finish afterward. Whether you’re considering a DIY approach or hiring a flooring professional, you’ll walk away knowing exactly what’s possible with your specific floor.
Quick Answer: Can Engineered Wood Actually Be Sanded?
Yes, engineered wood can be sanded—but it depends entirely on your wear layer thickness and the current condition of your floor.
Most modern engineered hardwood floors built after 2000 feature wear layers between 2 and 6 mm. These floors can typically withstand sanding at least once, with thicker veneers allowing multiple refinishing cycles over their lifespan. However, very thin veneers under 2 mm should generally not be fully sanded, as the risk of cutting through to the core is too high.
This is where engineered wood differs fundamentally from laminate or vinyl plank flooring. Those products feature a printed photographic layer over an HDF core—there’s no real wood to sand. Attempting to sand laminate destroys the image layer entirely, leaving you with an unusable surface. Engineered hardwood, by contrast, has an actual hardwood layer on top that can be refinished with the right approach.
The risk with improper sanding comes down to one thing: penetrating through the wood layer into the plywood core or HDF beneath. Once you hit that core, the damage is permanent. You’ll see exposed plywood texture, delamination begins, and the only solution is replacing the affected boards—or worse, the entire floor.
Consider a practical example. A 3 mm oak wear layer on a 14 mm total thickness board—common in floors installed around 2015—represents a typical modern engineered floor that can handle one careful full sanding. The 3 mm provides enough material to remove surface damage while preserving a sufficient wood layer above the core.
Contrast that with a 10 mm board featuring just a 1 mm veneer, which you might find in budget installations from the 1990s. This floor should avoid full sanding entirely. The margin for error is simply too thin. A single aggressive pass with a drum sander could consume the entire veneer in one go.
The key takeaway: sanding engineered wood is absolutely possible, but careful consideration of your specific floor’s construction must come first.
How Engineered Wood Is Built – And Why It Matters for Sanding
Understanding how your floor is constructed explains why wear layer thickness matters so much for refinishing decisions.
Engineered wood flooring consists of a real hardwood top layer—often called the wear layer or veneer—bonded to a stable core. This core is typically made from multiple layers of plywood arranged in cross-ply formation, or sometimes high-density fiberboard (HDF). The layered construction gives engineered floors their dimensional stability, making them less prone to expansion and contraction than solid wood flooring in climate-controlled homes.
Total board thicknesses commonly range from 10 to 20 mm, though 12 to 16 mm is most frequent in residential applications. However, this total thickness tells you almost nothing about sanding potential. What matters is how much of that total is actual hardwood.
The top hardwood layer varies dramatically across products. Budget or decorative engineered floors might feature veneers as thin as 0.6 to 1.5 mm. Premium constructions designed for longevity can have 5 to 6 mm wear layers, occasionally even 8 mm in high-end European products.
Picture the cross-section like this:
-
Top: The hardwood layer (real oak, walnut, maple, etc.)
-
Middle: The distinct line where wood meets core
-
Bottom: Multiple layers of plywood plies or HDF
Only that top layer—the beautiful wood you see and walk on—can be sanded. Everything below it is structurally weaker and cannot be refinished smoothly. Sanding into the core creates irreparable damage: visible plywood texture, delamination between layers, and a surface that no finish can restore.
Two common constructions illustrate the spectrum:
A 14 mm engineered board with a 3 mm oak wear layer represents solid mid-range construction. The 3 mm veneer provides material for refinishing while the 11 mm plywood core delivers stability. This floor can typically be sanded once fully, potentially twice with careful professional work.
A 10 mm board with just a 1 mm veneer sits at the other extreme. Despite similar appearance when installed, this floor offers almost no refinishing capacity. The thin veneer exists primarily for aesthetics, not longevity. Screen-and-recoat treatments that remove only 0.1 to 0.2 mm are the safe limit here.
The construction quality and layer thickness directly determine what’s possible with sanding and refinishing down the road.
The Wear Layer: Deciding Factor for Sanding Engineered Wood
Wear layer thickness is the single most important factor determining whether you can sand engineered wood flooring and how many times you can do it safely.
The wear layer is your total sanding budget. Each refinishing cycle withdraws from this budget. Once depleted, you’re left with a floor that cannot be sanded again without damage.
Typical Wear Layer Categories
Engineered floors generally fall into three categories:
Very thin (0.6–1.5 mm): Found in budget products, decorative installations, and many floors from the 1990s. These should not receive full sanding. Light screen-and-recoat treatments using 100-150 grit abrasive pads are the safe maximum, removing only 0.1 to 0.2 mm of material.
Standard (2–4 mm): The most common range in quality residential installations from 2000 onward. A 2-3 mm layer typically allows one careful full sanding. A 4 mm veneer layer extends this to potentially two sandings with professional care.
Thick (5–6 mm): Premium products designed for longevity. Thicker wear layers in this range can support 2-3 full sanding cycles, approaching the refinishing capacity of thin solid hardwood.
How Much Wood Does Sanding Remove?
Every sanding episode removes approximately 0.3 to 0.7 mm of wood, depending on several factors:
-
Initial damage depth requiring correction
-
Machine type (drum sanders remove more than orbital)
-
Operator skill and machine speed
-
Number of grit progressions used
A 3 mm wear layer might yield only 4 to 10 sanding passes total across its entire life—often exhausted in one overly aggressive session by an inexperienced operator who gouges 1 mm unevenly.
Rules of Thumb for Decision-Making
|
Wear Layer |
Sanding Recommendation |
|---|---|
|
Under 2 mm |
Light buffing only; screen and recoat |
|
2–3 mm |
One careful full sanding maximum |
|
4 mm |
Up to two sandings with professional care |
|
5–6 mm |
Multiple refinishes possible (2-3 cycles) |
How to Find Your Wear Layer Thickness
Before proceeding with any sanding project, verify your floor’s specifications:
-
Check manufacturer specs, often stamped on original cartons or available online by product name
-
Review installation invoices, which typically list veneer thickness in millimeters
-
Physical inspection at an inconspicuous location (threshold strip, under skirting boards, or closet transition)
If your floor is over 15-20 years old or shows signs of previous refinishing—such as beveled edges worn flat—seek professional assessment. A flooring professional can take a core sample or use ultrasound to measure remaining veneer thickness accurately.
What Sanding Engineered Wood Can and Cannot Fix
Understanding realistic expectations helps you decide whether sanding engineered wood makes sense for your situation—or whether replacement is the better path.
Problems Sanding Can Fix
The sanding process effectively addresses surface-level imperfections:
-
Surface scratches under 0.5 mm deep
-
General dullness from years of foot traffic
-
Abrasion marks from pet nails or chair legs
-
Minor stains limited to the finish layer
-
Worn areas around furniture and traffic paths
-
Sheen changes (converting from gloss to matte or vice versa)
-
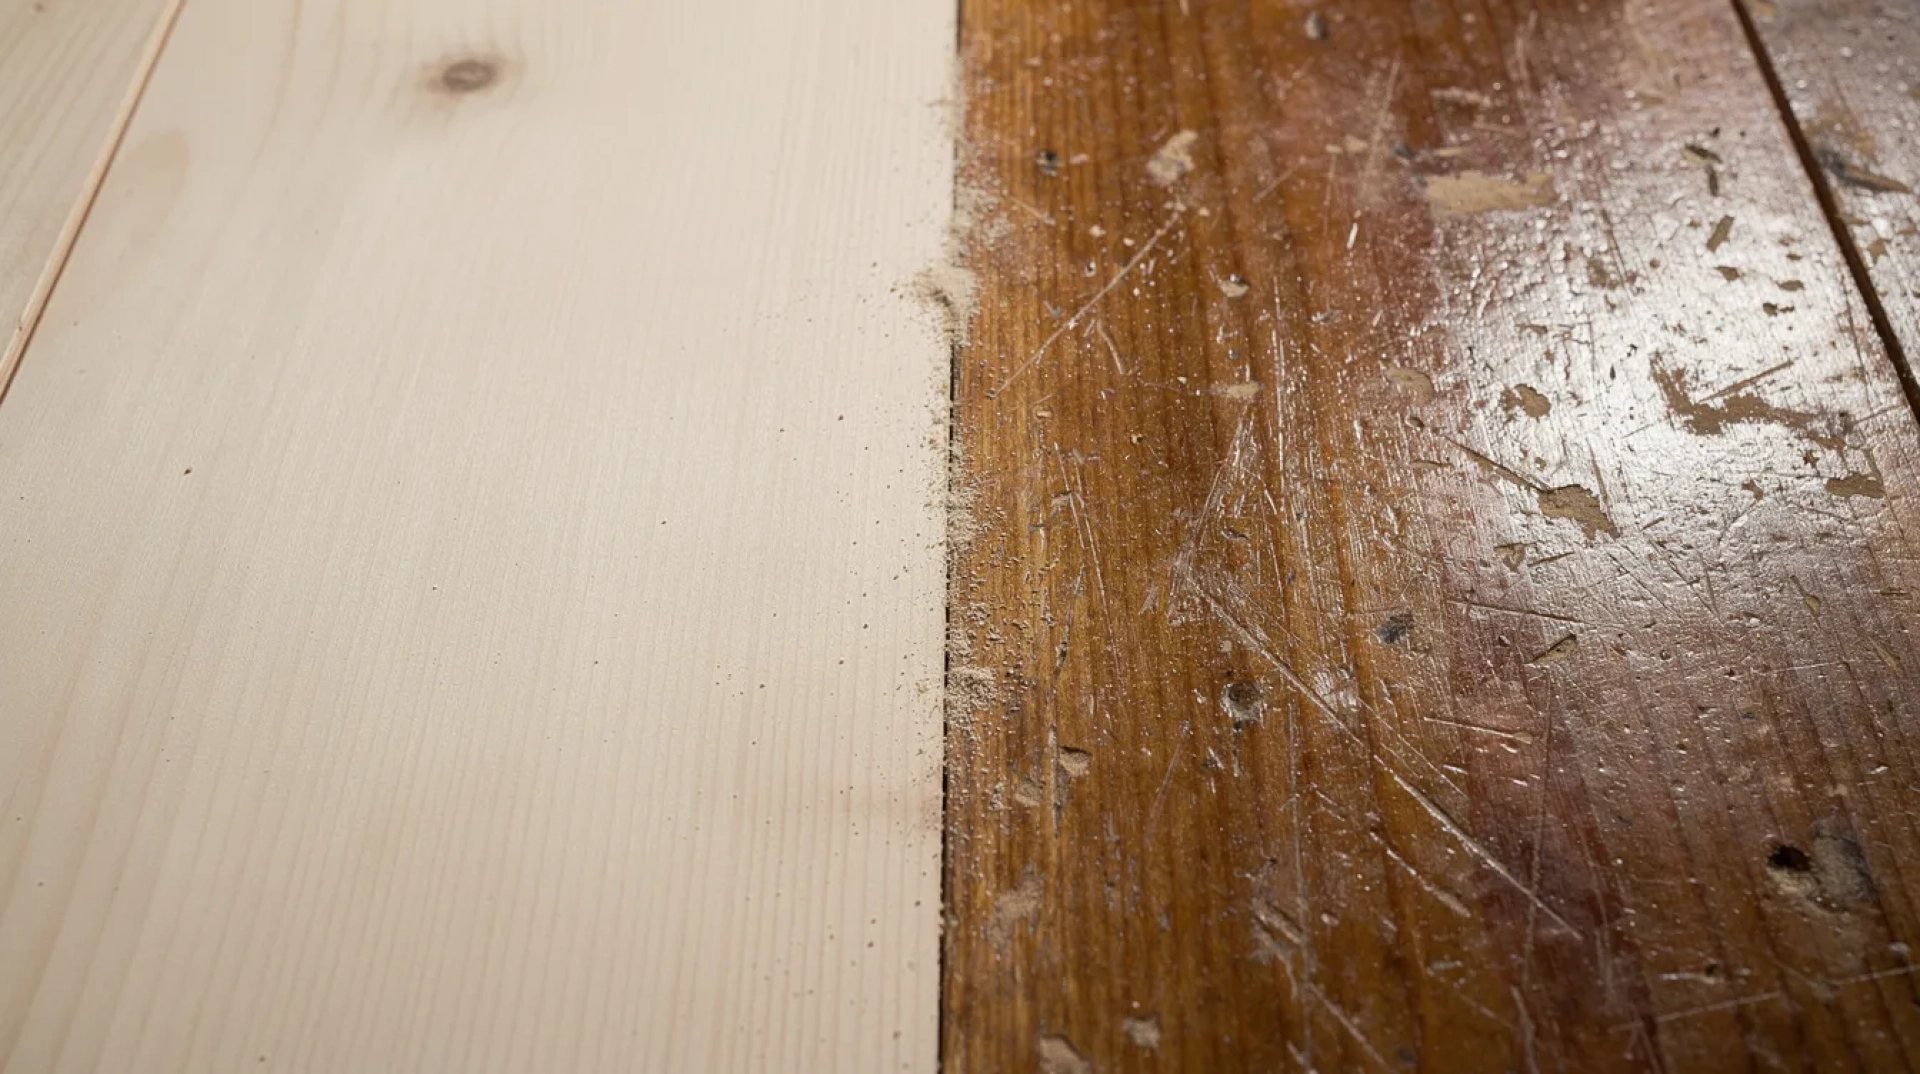
Existing finish removal for new coat application
A professional in Richmond, Virginia successfully restored a 3 mm engineered oak floor using orbital sanding. Pet scratches that had accumulated over eight years disappeared completely, and the floor received a fresh coat of finish—all without exposing the plywood core.
Problems Sanding Cannot Reliably Fix
Some damage goes beyond what sanding can address:
-
Deep scratches or gouges penetrating into the core
-
Severe cupping from moisture damage (boards warped over 2 mm high-to-low)
-
Delamination between the veneer layer and core
-
Water-swollen or buckled sections
-
Black mold staining embedded in the wood grain
-
Subfloor unevenness exceeding 3/32 inch
In one case, a warped 2.5 mm floor was recommended for board replacement after cupping refused to flatten even with skilled professional passes. The moisture damage had compromised the core structure beyond what surface sanding could correct.
When Partial Solutions Work Better
For thin or previously sanded floors, a light screen-and-recoat preserving 0.8-1.5 mm of veneer often makes more sense than aggressive full sanding. This approach refreshes the protective layer without risking breakthrough.
Isolated heavily damaged boards benefit from patch replacement with matching donor planks. Finding replacement boards from the original batch (or aging new ones to match) costs far less than risking the whole floor with aggressive sanding that might thin high spots unevenly.
The floor’s appearance can often be dramatically improved without full sanding—screen-and-recoat treatments address dullness and light wear while preserving your remaining veneer for future refinishing when truly necessary.
How Many Times Can You Sand Engineered Wood Flooring?
The number of times you can refinish engineered wood flooring depends on two factors: the original wear layer thickness and how aggressively previous sandings were performed.
Sanding Frequency by Veneer Thickness
Here’s what different veneer thicknesses typically allow:
2 mm wear layer: Usually permits only one very light sanding in its lifetime. Professional execution using orbital sanders and careful technique is essential. DIY attempts often consume the entire veneer.
3 mm wear layer: Typically supports one careful full sanding. Some professionals estimate 2-3 very light refinishing cycles are possible if each removes minimal material.
4 mm wear layer: Potentially two full sandings with professional care. This thickness provides meaningful refinishing capacity approaching thin solid wood.
6 mm wear layer: Up to three careful professional sandings. Optimistic sources claim 5-6 cycles for ultra-thick veneers if each pass is minimally aggressive.
The DIY Risk Factor
DIY misuse of heavy drum sanders can consume an entire sanding allowance in one session. Rental drum machines are powerful and unforgiving—removing 1-2 mm unevenly across a floor is disturbingly easy for inexperienced operators.
Professional sanders using planetary or belt machines with dust extraction typically limit removal to 0.4 mm per pass. The precision difference between professional and rental equipment often determines whether a floor survives refinishing intact.
Realistic Timeframes Between Sandings
In normal residential use, engineered hardwood floors require refinishing based on traffic levels:
|
Room Type |
Typical Interval |
|---|---|
|
Living rooms, hallways |
10-15 years |
|
Bedrooms |
15-20 years |
|
Guest rooms, offices |
20+ years |
These timelines assume normal wear patterns—roughly 5,000-10,000 steps per year in high-traffic areas. Homes with large dogs, young children, or frequent entertaining may see faster wear.
Warning Signs to Stop
Avoid sanding again if you observe any of these conditions:
-
Visible or tactile plywood core at edges
-
Exposed core around radiator pipe cut-outs
-
Thin spots at room transitions or thresholds
-
Beveled edges worn completely flat
-
Lumpy floor profile with variations exceeding 1.5 mm
These signs indicate the veneer has been depleted to dangerous levels. Further sanding will cause permanent damage requiring board replacement.
How to Check if Your Engineered Floor Is Safe to Sand
Assessing your floor’s suitability before renting equipment or hiring contractors prevents costly mistakes. A few minutes of investigation can save thousands in damaged flooring.
Step 1: Look Up Product Specifications
Start with the manufacturer’s information:
-
Search the product name online for specification sheets listing wear layer in millimeters
-
Check any original packaging stored in your garage or basement
-
Contact the manufacturer with your product code or name
Many major brands like Kahrs, Mirage, or Shaw publish detailed specifications online. A quick search often reveals exactly what you need.
Step 2: Review Installation Paperwork
Your installation documentation may contain the answer:
-
Original purchase invoice listing veneer thickness
-
Installation contractor’s records
-
Warranty documentation specifying product details
If you purchased the home with the floor already installed, the previous owner may have left paperwork, or the installing contractor might have records.
Step 3: Physical Inspection
When documentation isn’t available, inspect the floor directly at an inconspicuous location:
-
Lift a threshold strip at a doorway transition
-
Remove skirting boards in a closet or hidden corner
-
Check around radiator pipe penetrations
-
Examine any existing cut-outs or transitions
Look for these indicators:
-
Distinct hardwood layer visible above the plywood plies
-
Clear demarcation line where the veneer meets the core
-
Consistent thickness of the top layer across visible edges
-
No exposed core at edges, corners, or high-wear areas
If you can see or feel the plywood texture anywhere on the surface, previous sanding has likely depleted the veneer beyond safe limits.
When to Call a Professional
Seek professional assessment in these situations:
-
Floor installed more than 15-20 years ago
-
Evidence of previous refinishing (micro-bevels sanded flat, finish inconsistencies)
-
Unknown floor history in a purchased home
-
Visible wear at transitions or edges suggesting thinning
-
Any uncertainty about remaining veneer depth
Flooring professionals can take core samples or use specialized tools to measure remaining veneer thickness accurately. This assessment typically costs far less than the damage from an ill-advised sanding attempt.
DIY vs Professional Sanding on Engineered Wood
Engineered wood is significantly less forgiving than traditional hardwood when it comes to sanding. The finite wear layer means mistakes are often permanent, making the DIY-versus-professional decision more consequential.
When DIY Makes Sense
DIY sanding can work well under specific conditions:
-
Light abrasion sanding (screen and recoat) only
-
Small rooms under 200 square feet
-
Floors with verified 3+ mm wear layers
-
Minor dullness rather than deep scratches
-
Using an orbital sander rather than a drum sander
For a bedroom with confirmed thick veneer showing only surface dullness, a careful homeowner can achieve good results with proper preparation and patience.
When Professionals Are Essential
Professional sanding is strongly recommended for:
-
Unknown floor history or uncertain veneer thickness
-
Entire-house refinishing projects
-
Deep scratches requiring significant material removal
-
Complete finish type changes (oil to polyurethane, for example)
-
Floors with cupping, unevenness, or prior damage
-
Any floor where you cannot verify veneer thickness
Equipment Differences
The equipment gap between professional and rental services significantly impacts results:
Professional equipment:
-
Multi-disc planetary sanders tuned to 0.2 mm passes
-
Belt sanders with precise depth control
-
Dustless systems meeting modern VOC regulations
-
Edge sanders designed for perimeter work
Rental equipment:
-
Heavy drum machines prone to divots and gouges
-
Less precise depth control
-
Greater dust generation
-
Higher risk of uneven material removal
Pros reduce swirl risks by approximately 70% compared to DIY drum sander use, according to industry professionals.
Cost-Risk Analysis
The financial calculation often favors professional work:
|
Option |
Typical Cost |
|---|---|
|
Professional sanding |
$3-6 per square foot |
|
DIY sanding (equipment rental) |
$1-2 per square foot |
|
Board replacement after veneer burnout |
$10-20 per square foot |
|
Full floor replacement |
$15-30 per square foot |
A professional job on a 500 square foot room costs $1,500-3,000. Burning through the veneer with aggressive DIY sanding and needing board replacement costs $5,000-10,000 for the same space.
The $1,000-2,000 saved on DIY carries substantial risk when measured against potential replacement costs five to ten times higher than professional refinishing.
Basic Process: How to Sand Engineered Wood Safely
This step-by-step guide focuses on protecting your thin wear layer while achieving professional-quality results. Each stage matters for preserving your floor’s integrity.
Preparation
Proper preparation prevents damage and ensures even results:
Clear the room completely:
-
Remove all furniture, rugs, and decorations
-
Take down curtains near windows
-
Cover doorways with plastic sheeting
-
Tape HVAC vents to prevent dust circulation
Prepare the floor surface:
-
Punch down any protruding nails below surface level
-
Remove or carefully lift skirting boards if necessary
-
Vacuum thoroughly with a soft-brush attachment
-
Wipe with a damp cloth to remove remaining grit
Even small debris particles can cause deep scratches when trapped under a sander. Meticulous cleaning before starting is essential.
Equipment Selection
Choose the right floor sander for engineered wood:
Preferred: Orbital or multi-disc sanders
-
Remove material gradually and evenly
-
Lower risk of gouging or uneven spots
-
More forgiving of technique variations
-
Better for maintaining consistent depth
Use with caution: Drum sanders
-
Remove material quickly—sometimes too quickly
-
Higher risk of divots and uneven surfaces
-
Require constant movement and careful technique
-
Avoid entirely on floors with 3 mm or less wear layer
Edge sanders and sanding blocks:
-
Use along walls and in corners where floor sander cannot reach
-
Hand blocks for detail work around fixtures
-
Essential for uniform surface across the entire floor
Grit Progression
Follow this sandpaper grit sequence for engineered floors:
Starting grit (60-80):
-
Removes existing finish and surface damage
-
Avoid 24-40 grit on engineered wood—too aggressive
-
Make passes with the wood grain
-
Keep machine moving at 1-2 feet per second
Medium grit (100-120):
-
Removes scratches from coarse sanding
-
Creates smoother surface profile
-
Vacuum all the dust between grits
Fine grit sandpaper (150-180 or 220):
-
Final smoothing before finish application
-
Creates ideal surface for finish adhesion
-
Use a tack cloth for final dust removal
Critical Safety Practices
Throughout the sanding process:
-
Always sand with the grain, never across it
-
Keep the machine moving constantly—stopping creates divots
-
Check edges and high spots frequently for core exposure
-
Feel the surface periodically for any plywood texture
-
Stop immediately if you see color change indicating core
High spots and board edges thin fastest. These areas require extra attention and frequent inspection. If the natural colour of the core becomes visible, stop sanding that area immediately.
Final Steps Before Finishing
After completing fine grit sandpaper passes:
-
Vacuum entire floor thoroughly
-
Wipe with a tack cloth to remove fine particles
-
Use a damp cloth for final dust removal
-
Allow floor to dry completely before finishing
-
Inspect entire floor for any missed areas or damage
Choosing a New Finish After Sanding
The new finish protects your freshly sanded wear layer and dramatically affects your floor’s appearance and maintenance requirements for years to come.
Water-Based Polyurethane
Characteristics:
-
Fast drying (2-4 hours between coats)
-
Low odor during application
-
Keeps wood light, minimal yellowing over time
-
Clear finish maintains the natural beauty of light woods like maple or white oak
Best for:
-
Light-colored wooden floors where you want to preserve tone
-
Occupied homes where quick return to use matters
-
Low-VOC requirements
-
Modern, clean aesthetic
Oil-Based Polyurethane
Characteristics:
-
Amber tone that warms over time
-
Longer cure time (24-72 hours between coats)
-
Traditional appearance on classic hardwoods
-
Excellent durability once fully cured
Best for:
-
Traditional hardwood aesthetics on oak, walnut, or cherry
-
High-traffic areas requiring maximum durability
-
Floors where warm undertones complement décor
-
Projects where extended cure time isn’t problematic
Hardwax Oils
Characteristics:
-
Natural matte appearance
-
Penetrates into wood rather than sitting on top
-
Easier spot repairs without sanding floors entirely
-
Requires more routine maintenance
Best for:
-
Natural, low-sheen preferences
-
European-style interiors
-
Homeowners comfortable with periodic maintenance
-
Floors where localized repair capability matters
Sheen Selection
|
Sheen Level |
Gloss % |
Best For |
|---|---|---|
|
Matte |
5-10% |
Hiding scratches, modern aesthetic |
|
Satin |
15-25% |
Balance of beauty and practicality |
|
Semi-gloss |
40-50% |
Formal rooms, easier cleaning |
|
Gloss |
70%+ |
Traditional look, shows wear quickly |
Matte and satin sheens hide scratches best in busy homes with children and pets. High gloss shows every scuff and footprint but provides timeless beauty in formal spaces.
Curing Times
Respect proper cure times for a durable finish:
-
Light foot traffic: 24 hours minimum
-
Normal use: 48-72 hours
-
Area rugs and furniture: 3-7 days depending on product
-
Heavy furniture and appliances: 7-14 days
Rushing these timelines risks permanent impressions in the finish and compromises long-term durability. Full cure allows the high quality finish to reach maximum hardness.
Ongoing Care to Delay the Next Sanding
Good maintenance dramatically extends the time between refinishing cycles. A well-maintained engineered floor can go 10-15 years longer between sandings than a neglected one, maximizing the value of your limited wear layer.
Daily and Weekly Protection
Small habits make enormous differences:
Furniture protection:
-
Install felt pads on all furniture legs (reduces chair scratches by up to 80%)
-
Replace felt pads when worn or flattened
-
Use furniture cups under heavy pieces
-
Lift furniture rather than dragging when rearranging
Entry management:
-
Place quality entrance mats at all exterior doors (traps 85% of incoming grit)
-
Use both exterior and interior mats at main entries
-
Clean mats regularly to maintain effectiveness
-
Consider shoe-free zones in main living areas
Regular cleaning:
-
Vacuum weekly with soft-brush vacuum heads
-
Use appropriate cleaning solution for your finish type
-
Avoid spray mops that deposit excess moisture
-
Clean spills immediately
What to Avoid
Certain practices accelerate wear and damage finishes:
Never use:
-
Steam mops (moisture penetrates 1-2 mm, loosening adhesive bonds)
-
Soaking wet mops or excessive water
-
Harsh chemicals like bleach or ammonia (degrade finishes 2-3 times faster)
-
Abrasive cleaning pads or steel wool
-
Oil-based soaps on polyurethane finishes
Protect against:
-
Direct sunlight causing uneven fading (use window coverings)
-
Rolling chairs without protective mats
-
Pet nails kept too long
-
High heels concentrating weight on small points
Periodic Maintenance Without Full Sanding
When the existing finish looks dull but the wood beneath remains intact, a screen-and-recoat provides protection without consuming veneer:
-
Light screening with fine abrasive pads
-
New coat of finish applied over prepared surface
-
Restores protection and sheen
-
Uses no wear layer depth
This approach can be done every 5-7 years in moderate-use areas, potentially delaying full sanding by a decade or more. It’s particularly valuable for engineered floors with limited remaining veneer.
Maximizing Floor Lifespan
Your engineered floor represents a significant investment, and the wear layer is a finite resource. Combining proper maintenance with gentle refinishing techniques when needed can extend your floor’s service life by decades.
Understanding wear layer thickness remains the foundation of all sanding decisions. A floor with 4 mm of veneer and careful owners might serve 40-50 years with two professional sandings. The same floor with aggressive early sanding and poor maintenance might need replacement in 15 years.
Whether you lightly sand with an orbital sander yourself or hire a flooring professional for a complete refinish, the principles remain constant: verify your veneer thickness, use appropriate techniques, and protect your investment with ongoing care.
Your engineered wood flooring can maintain its natural beauty for generations—but only if you approach refinishing with the careful consideration its construction demands. Start by checking your floor’s specifications, and you’ll have the foundation for every decision that follows.